Utilizamos cookies propias y de terceros para mejorar la experiencia de navegación, y ofrecer contenidos de interés. Al continuar navegando entendemos que se acepta nuestra política de cookies Aceptar
Defender Roof Console  - Defender Roof Console is supplied with all fixings, interior lamp extension loom
Price
399,00 EUR 359,99 EUR   VAT not included OFFER
Delivery term In stock
Quantity
Color
Serves for
· LAND ROVER Defender [1984-2015]
Defender Roof Console

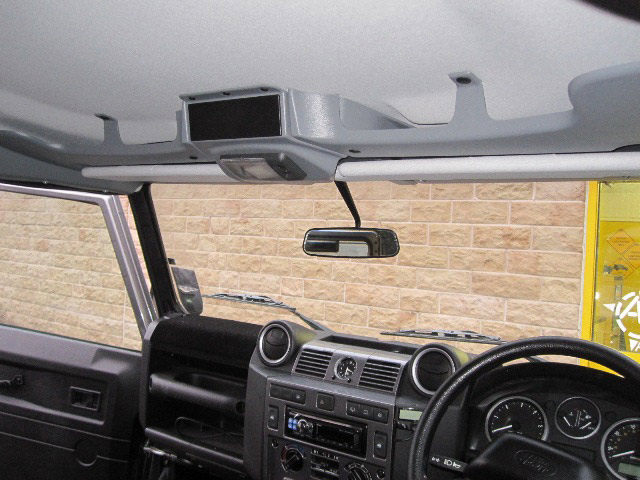
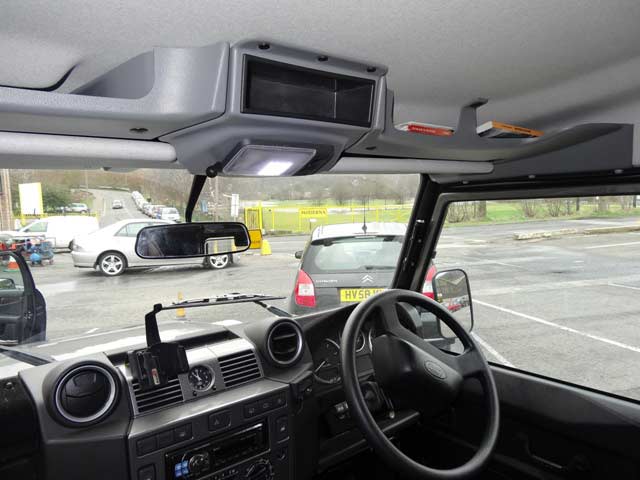
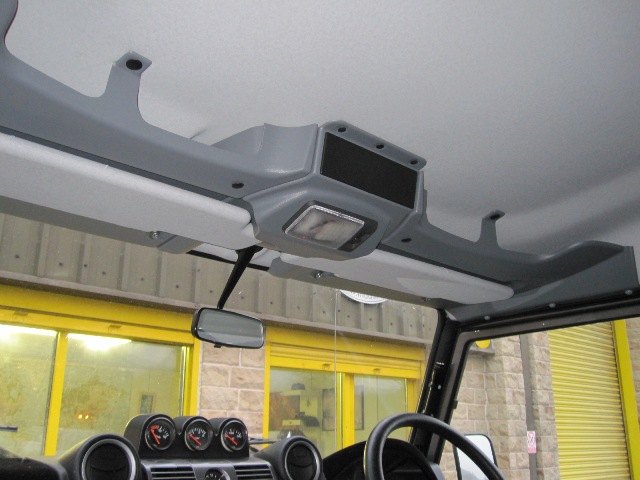
Defender Roof Console offers a unique storage solution for the Land Rover Defender in providing additional overhead roof storage as well as a Single DIN provision in one unit.


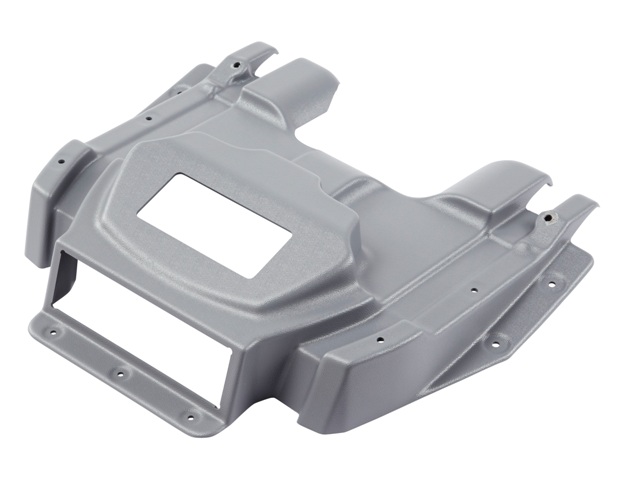
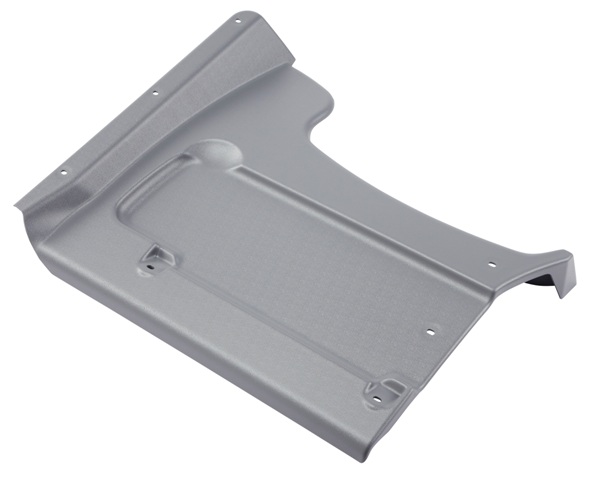
Defender Roof Console comes in three individually designed pieces to make the most of the overhead space. The centre section has been designed to hold any DIN sized application aswell as relocating the original interior light.


With the two side sections designed to hold anything fr0m maps to sunglasses.


Defender Roof Console is supplied with a DIN blanking panel but the central binnacle will fit any DIN sized accessory such as the DIN Pocket pictured below.

Defender Roof Console is supplied in three separate pieces. The product has been designed with CAD software and the moulding finished off using CNC machinery to ensure an OE level fit and finish to the product.


Will the Defender Roof Console fit my vehicle?

The MUD Defender Roof Console has been designed to fit all post 1983 Defender models without a sunroof and with a factory headlining.

If you have a non factory headlining it is unlikely it will fit without modification of the headling (please see the dimensions provided below).

If you have a Series vehicle, again it is unlikely it will fit without modification.


Defender Roof Console fits all Defenders except sunroof equipped models. The fixing method does not require removal or cutting of the headlining or sun visors. (Some later models will require trimming of the central area of the headlining when fitting a DIN unit).


The central binnacle will accept a Single DIN sized accessory such as a Stereo, CB/HAM radio or even a digital tachograph.


The Single DIN aperture will also accept a bank of seven by using the Carling interlocking switch mounts. For a bank of seven Carling switches you would require, 2 x interlocking ends & 5 x interlocking centres.


The two storage pockets are large enough to store maps, documents and magazines


Defender Roof Console is supplied with all fixings, interior lamp extension loom.


Defender Roof Console Fitting Instructions

Estimated fitting time 45 minutes to 1 hour.


1. Remove roof lining trim fixings fr0m above the door opening.

2. Remove the sun visors by removing fixing screws x4.


3. Remove interior light lens by releasing with a small flat bladed screwdriver.


4. Remove interior light by unscrewing the two 8mm nuts.


5. The interior light will now release fr0m the base plate

6. Remove earth wire terminal fr0m base plate and remove base plate fr0m within the headlining.

7. At this point decided whether you need to use the interior lamp extension loom provided to reach the relocated interior lamp. Insert male terminals into the wiring harness plug and earth wire. Protect the un-insulated terminals at the opposite end of the extension loom ends to prevent short-cicuits. Alternatively disconnect battery.

8. Offer up the centre section of the roof console wraps around the front of the headlining as illustrated.

9. Centralise the roof console by using the 2 x inner sun visor screws to temporarily hold the console in place while you drill the holes for the fir-tree fasteners.


10. With the console held in place by 2 x sun-visor screws you are ready to drill the holes for the fir-tree fasteners.

11. Use a 4.5mm diameter drill for the 3 x small fir tree fasteners. Note that on some models the centre fastener will go into an additional strengething rib then runs down the centre of the roof.

12. Fit the 3 x small fir-tree fasteners.


13. Use a 6mm diameter drill for the 4 x larger fir-tree fasteners at the side fixing positions.


14. it the 4 x large fir-tree fasteners.


15. With the central section of the roof console now held in place by the fir-tree fasteners, remove the 2 x sun visor screws. You are now ready to fit the left and right hand console sections.


16. Place the sun-visor onto the outer section of the roof console. Use the longer sun-visor fixing srews supplied within the fitting kit.

17. On the reverse side of the panel place one of the outer spacers over the outer of the sun-visor fixings nearest the door.


18. Offer up the outer section of the roof console. Start to secure the sun-visor screws. It can be done by one person or you may wish to get another pair of hands to assist.


19. When you are happy the sun-visor screws have started, secure with a screwdriver


20. Check the alignment of the fixings for the remaining fir-tree fasteners holes where they meet the central console section and push the remaining fasteners home.


21. Use the remaining large fir tree fasteners for the central shelf supports. Use a 6mm diameter drill for fixing holes.


22. The outer edges of the roof console that extend above the doors are secured using self tappers that use a plastic washer to secure the grey screw caps


23. Drill into the door frame using a 4mm diameter drill. The door frame is tougher than you think than you think so yse a good drill bit

24. Fasten in place using the smaller self tapping screws. The screw heads are concealed by pushing the grey screw caps onto the plastic washer base


*Please be aware that the rear washer pipework runs above the left hand door.

25. Attach the interior light wiring (and extension loom if required) to the interior lamp terminals as per pictur


26. Attach base plate earth terminal and slide the base plate into place within the roof console

27. Fix interior lamp into place. Insert bulb, check lamp operation and refit interior light lens

JOB DONE!


Others Related Products (10)